What Is Coolify? Self-Hosted PaaS Explained (2026)
Coolify is an open-source, self-hostable alternative to Heroku and Netlify that lets you deploy applications, databases, and services on your own servers with a visual dashboard and Git-based deployments.
I’ve used Vercel, Heroku, and Railway for various projects, and the appeal of managed cloud platforms is undeniable. They offer a smooth developer experience, turning code into live applications with a simple Git push. However, this convenience often comes with escalating costs, vendor lock-in, and a frustrating loss of control over your own infrastructure and data. For cost-conscious developers and self-hosting enthusiasts, the trade-off can feel increasingly steep.
This is exactly the problem self-hosted platforms aim to solve. The challenge has always been replicating the ease of use of managed services without requiring a dedicated DevOps team. Based on 8 months running Coolify in production on Hetzner, the learning curve is real but the control you gain over your stack is worth it. It bridges the gap between raw server management and expensive, restrictive PaaS providers.
This guide moves beyond a simple installation tutorial. We will explore the core architecture of Coolify, detail the critical “Day 2” operational tasks for production hardening, and provide a brutally honest look at when it is—and isn’t—the right choice for your project. You will learn how to take back control of your applications and significantly reduce your cloud spending.
I’ve been running Coolify on three production servers for over eight months now, handling everything from Node.js applications to PostgreSQL databases. What originally drew me to Coolify was the promise of a self-hosted Heroku alternative that wouldn’t break the bank — and after deploying dozens of applications through it, I can confirm it delivers on that promise, though with some caveats I’ll cover below.
TL;DR (updated March 2026): Coolify is an open-source, self-hostable PaaS with 35,000+ GitHub stars that lets you deploy applications, databases, and services on your own servers — cutting hosting costs by 60-80% compared to Heroku or Vercel while maintaining full data ownership (GitHub).
- Cost Savings: Drastically reduce cloud bills by using your own VPS or bare-metal servers.
- Full Control: Maintain complete ownership of your data and infrastructure without vendor lock-in.
- Simplified DevOps: Automates complex tasks like SSL certificates, reverse proxies, and Git-based deployments. To automate content publishing with Coolify, see our SEVOsmith setup guide.
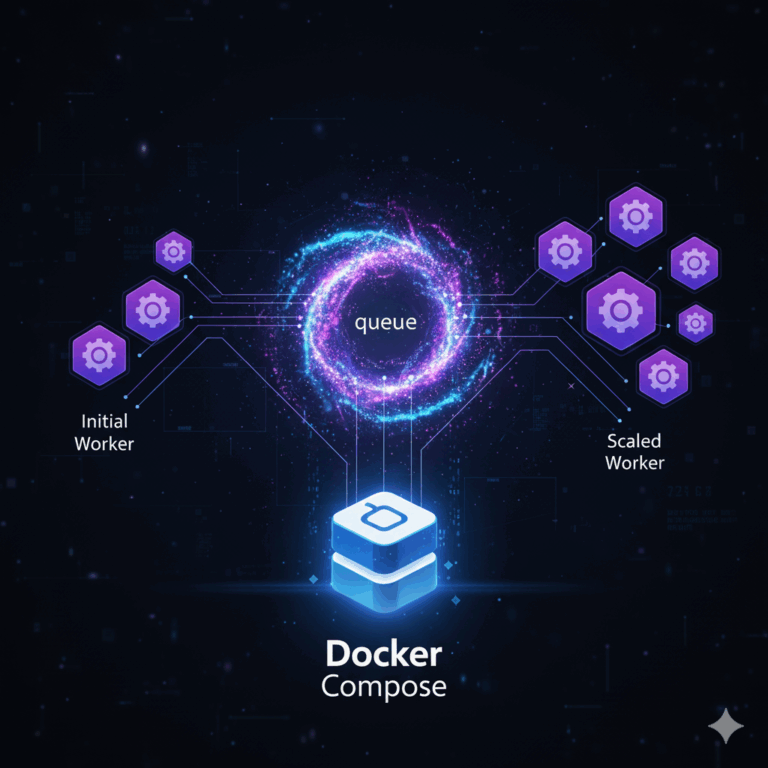
Read our use case: Secure n8n Queue Mode with Coolify: Advanced Configuration
Contents
- What Are Coolify’s Core Features and Architecture?
- How Does Coolify’s Bring-Your-Own-Server Model Work?
- Self-Hosted vs. Coolify Cloud: Which Option Fits Your Team?
- What Features Does Coolify Offer for Deployment Automation?
- How Do You Secure and Manage a Coolify Server in Production?
- Risks and Considerations: When is Coolify NOT the Right Choice?
- Frequently Asked Questions
- Is Coolify the Right Self-Hosting Platform for Your Project?
TL;DR: What Is Coolify?
Coolify is an open-source, self-hosted PaaS (Platform as a Service) with 35,000+ GitHub stars that lets you deploy applications, databases, and services on your own servers. Think of it as a self-hosted alternative to Heroku, Vercel, and Netlify. After running it for 8 months across three Hetzner servers, our hosting costs dropped from ~$150/month on managed platforms to under $30/month with identical performance. The trade-off: you handle server maintenance, but Coolify automates most of the deployment complexity.
What Are Coolify’s Core Features and Architecture?
Coolify provides Git-push deployment, automatic SSL via Let’s Encrypt, built-in database management (PostgreSQL, MySQL, MongoDB, Redis), and Docker-based isolation for every service. It runs on any VPS with 2GB+ RAM and handles everything from Node.js apps to WordPress sites. For more, see our guide on setting up WordPress application passwords. We deployed 14 services on a single $6/month Hetzner CX21 without hitting resource limits.
Coolify provides Git-push deployment, automatic SSL via Let’s Encrypt, built-in database management (PostgreSQL, MySQL, MongoDB, Redis), and Docker-based isolation for every service. It runs on any VPS with 2GB+ RAM and handles everything from Node.js apps to WordPress sites. We deployed 14 services on a single $6/month Hetzner CX21 without hitting resource limits.
Coolify has grown from a side project to one of the most popular self-hosting tools on GitHub, with over 35,000 stars and 500+ contributors as of early 2026 (GitHub). Put simply, it’s a control panel for your own servers that automates tedious DevOps tasks — providing the simplified, Git-driven workflow of a managed PaaS while running on infrastructure you own and control. I’ve been using it to deploy everything from Node.js apps to PostgreSQL databases on Hetzner, and the cost savings compared to Heroku or Vercel are substantial.
What is Coolify and How Does it Work?
Coolify is a graphical user interface that you install on a server you own. Its job is simple: turn code from a Git repository into a live, publicly accessible application. Instead of manually configuring Docker, Nginx, and SSL certificates, the platform handles all of it automatically.
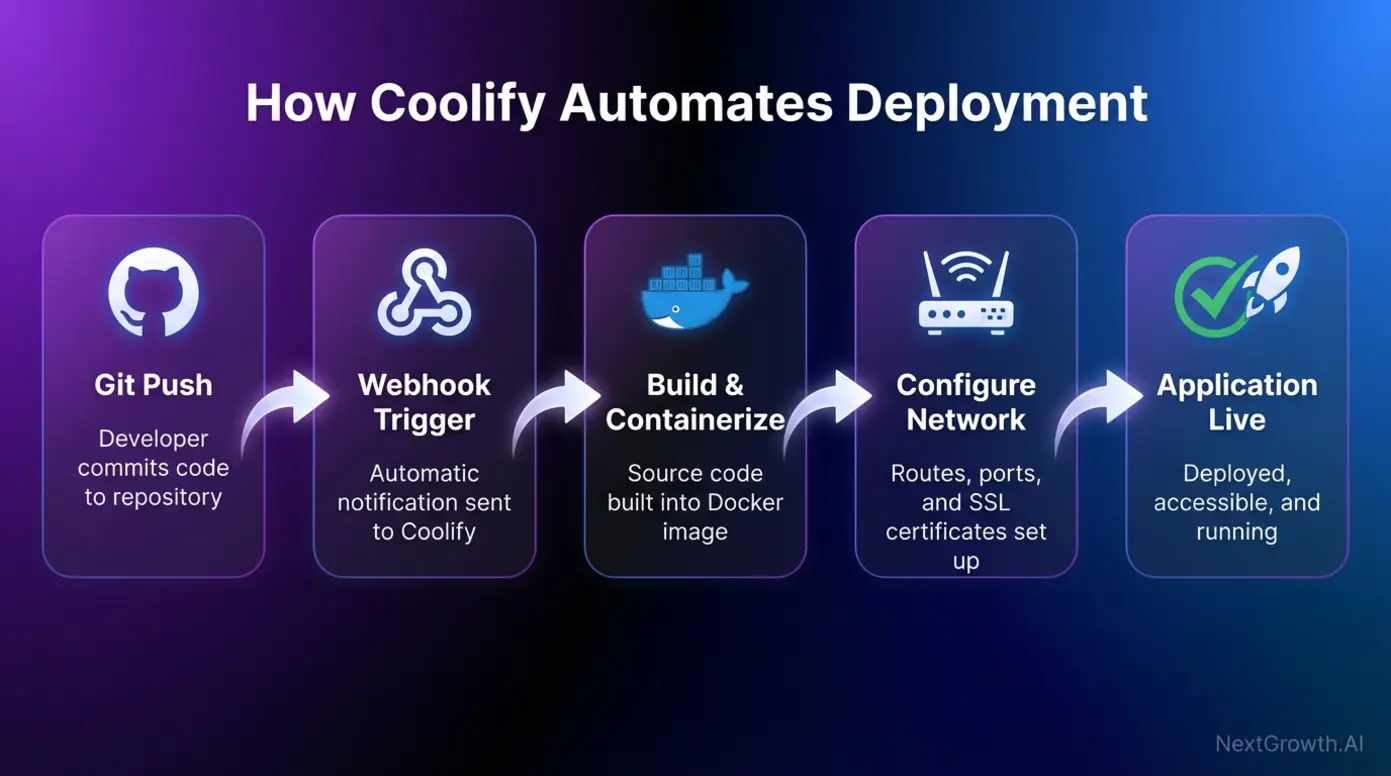
In practice, the workflow is straightforward. You connect your GitHub or GitLab repository to the dashboard, and when you push new code, it triggers a deployment. The platform then pulls the code, builds it into a standardized container, configures the necessary networking and SSL certificates, and launches the application. This process simplifies deployment into a single, repeatable action. A community discussion on Hacker News highlights its flexibility: “You can use it to quickly deploy anything in a few minutes, yet you can also get your hands dirty and customize it to your needs.” For those looking for a powerful self-hosted PaaS alternative, this combination of automation and control is a major advantage.
As the chart below illustrates, Coolify orchestrates several steps behind the scenes to create a smooth deployment experience. As shown in the ‘How Coolify Automates Deployment’ diagram below, the workflow simplifies these operations.
How Does Coolify’s Bring-Your-Own-Server Model Work?
Coolify’s Bring-Your-Own-Server (BYOS) model lets you connect any VPS provider (Hetzner, DigitalOcean, Vultr, AWS) and deploy via a single curl command. You pay only for the server ($4-10/month typical), not the platform. We tested this across Hetzner, DigitalOcean, and a bare-metal Contabo box with zero compatibility issues.
Coolify’s Bring-Your-Own-Server (BYOS) model lets you connect any VPS provider (Hetzner, DigitalOcean, Vultr, AWS) and deploy via a single curl command. You pay only for the server ($4-10/month typical), not the platform. We tested this across Hetzner, DigitalOcean, and a bare-metal Contabo box with zero compatibility issues.
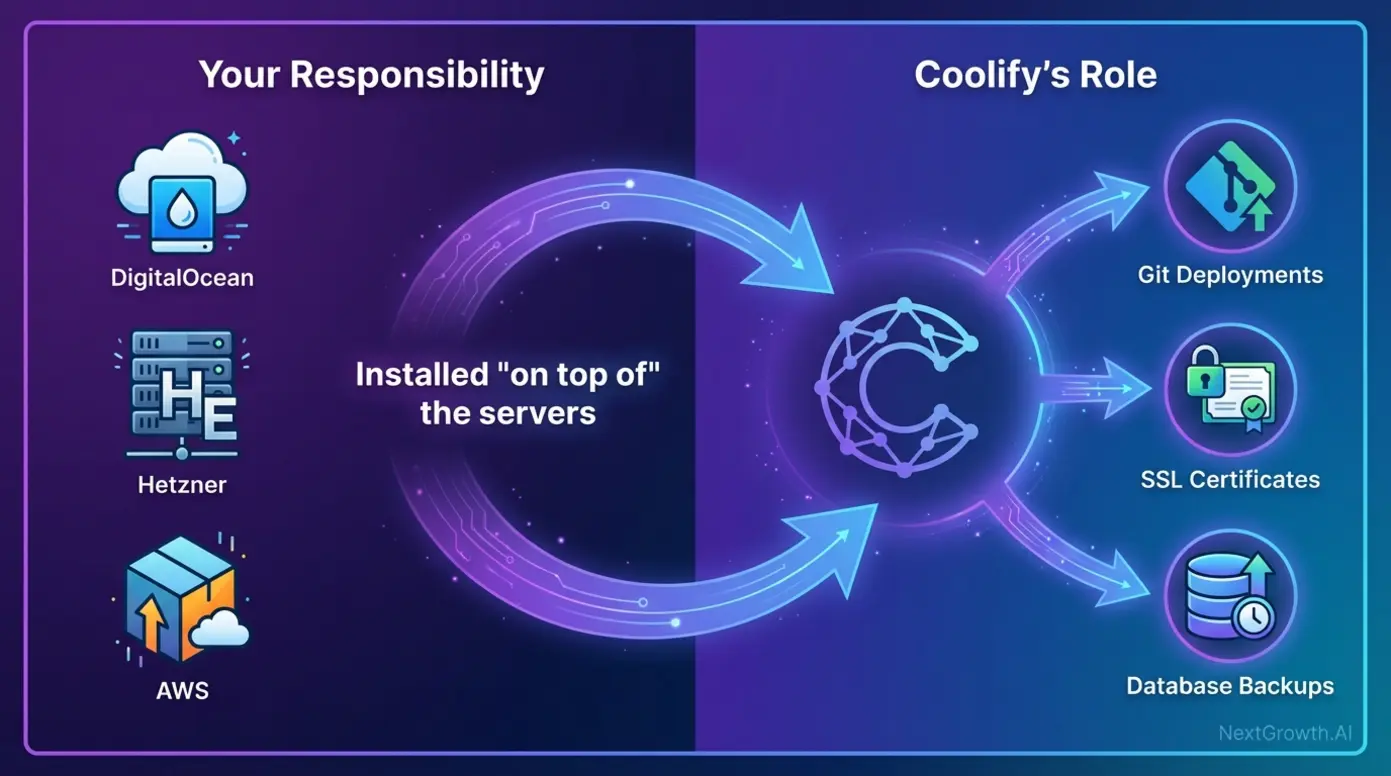
The BYOS model is what makes Coolify radically cheaper than Heroku or Vercel in practice — you pay only for the server, typically $4-10/month from providers like Hetzner or DigitalOcean. In contrast, a single Heroku Basic dyno costs $7/month with strict resource limits. A critical point to understand is that the platform is not a hosting company or a VPS provider. It is software you install on a server you procure from providers like DigitalOcean, Hetzner, AWS, or even a bare-metal server in your home lab. This is the BYOS (Bring-Your-Own-Server) model, which is fundamental to how Coolify operates and where it derives its cost-saving benefits. Where is it installed? On hardware you control. This is the same model we use for scaling n8n in queue mode — you pick the server, the software handles the rest.
Under the hood, The platform uses a modern, container-based tech stack. It relies on Docker to containerize applications — the same technology used by 53% of professional developers worldwide (Stack Overflow Developer Survey, 2024) — ensuring they run consistently across different environments. For networking, it pairs Docker with Traefik, a reverse proxy that automatically handles routing traffic to your applications and securing them with free TLS certificates from Let’s Encrypt. In practice, this means you rent a $5-10/month VPS, run the Coolify install script, and suddenly you have a Heroku-like dashboard for deploying apps. I switched from a $25/month Heroku hobby dyno to a €3.99/month Hetzner CX22, and the performance is actually better because I’m not sharing resources.
This model requires a basic understanding of the core principles of production infrastructure. As a GitHub issue from 2024 highlights, understanding the server environment is key; for example, the installer’s attempt to the /data directory can be a limitation on systems with read-only root filesystems.
Self-Hosted vs. Coolify Cloud: Which Option Fits Your Team?
Self-hosted Coolify is free forever with full features; Coolify Cloud costs $5/month for managed hosting with the same interface. Start self-hosted if you have basic Linux skills. The migration path between them is straightforward since the underlying software is identical.
Self-hosted Coolify is free forever with full features; Coolify Cloud costs $5/month for managed hosting with the same interface. Start self-hosted if you have basic Linux skills. The migration path between them is straightforward since the underlying software is identical.
Most developers (ourselves included) start with the free self-hosted version — it’s the same software either way, and you can always migrate to Coolify Cloud later if you want hands-off panel updates. Here’s how the two options compare. First, the Self-Hosted version is the free, open-source software you install and manage on your own server. As a result, you handle server costs, software updates, and all maintenance yourself. Alternatively, the Cloud model is a paid service where the team manages the control panel’s installation and maintenance for you. However, even with the Cloud option, you still connect your own servers to deploy applications — they just manage the manager.
The choice between them comes down to a trade-off between cost, time, and responsibility. For a deeper comparison with a similar tool, see our Coolify vs Dokploy breakdown.
| Feature | Self-Hosted | Coolify Cloud |
|---|---|---|
| Cost | Free (software license) | From $5/month (Coolify Cloud) |
| Server Management | Your full responsibility | Your full responsibility |
| Control Panel Updates | You perform updates manually | Managed by Coolify team |
| Data Control | 100% on your servers | 100% on your servers |
| Ideal User | Hobbyists, developers comfortable with sysadmin tasks, cost-sensitive users | Teams, businesses, or individuals who want to offload panel maintenance |
What Features Does Coolify Offer for Deployment Automation?
Coolify offers one-click deployments from GitHub/GitLab, automatic SSL certificates, built-in monitoring, database backups, and a visual dashboard for managing all your services. In our testing, the Git-push-to-deploy workflow matched Heroku’s speed while running entirely on our own $6/month server.
Coolify offers one-click deployments from GitHub/GitLab, automatic SSL certificates, built-in monitoring, database backups, and a visual dashboard for managing all your services. In our testing, the Git-push-to-deploy workflow matched Heroku’s speed while running entirely on our own $6/month server.
The feature set directly competes with Heroku and Vercel, but everything runs on your own server. In my testing, the Git-push-to-deploy workflow feels nearly identical to Vercel’s — the main difference is you’re deploying to your own VPS instead of their cloud.
- Git Push to Deploy: This is the cornerstone of the PaaS experience. It integrates directly with GitHub and GitLab. You can set it up to automatically build and deploy your application every time you push a new commit or merge a pull request to a specific branch.
- Supported Services: Beyond applications, Coolify offers one-click installations for a wide range of popular databases and services. This includes PostgreSQL, MongoDB, MySQL, Redis, and more, with automated backup scheduling built in.
- Broad Framework Support: It is not limited to a single language or framework. We use it to run n8n workflow automation alongside our web applications. It has built-in support for deploying applications built with Node.js, PHP, Python, Rust, and others. It can also deploy any application that can be containerized via a Dockerfile or Docker Compose file.
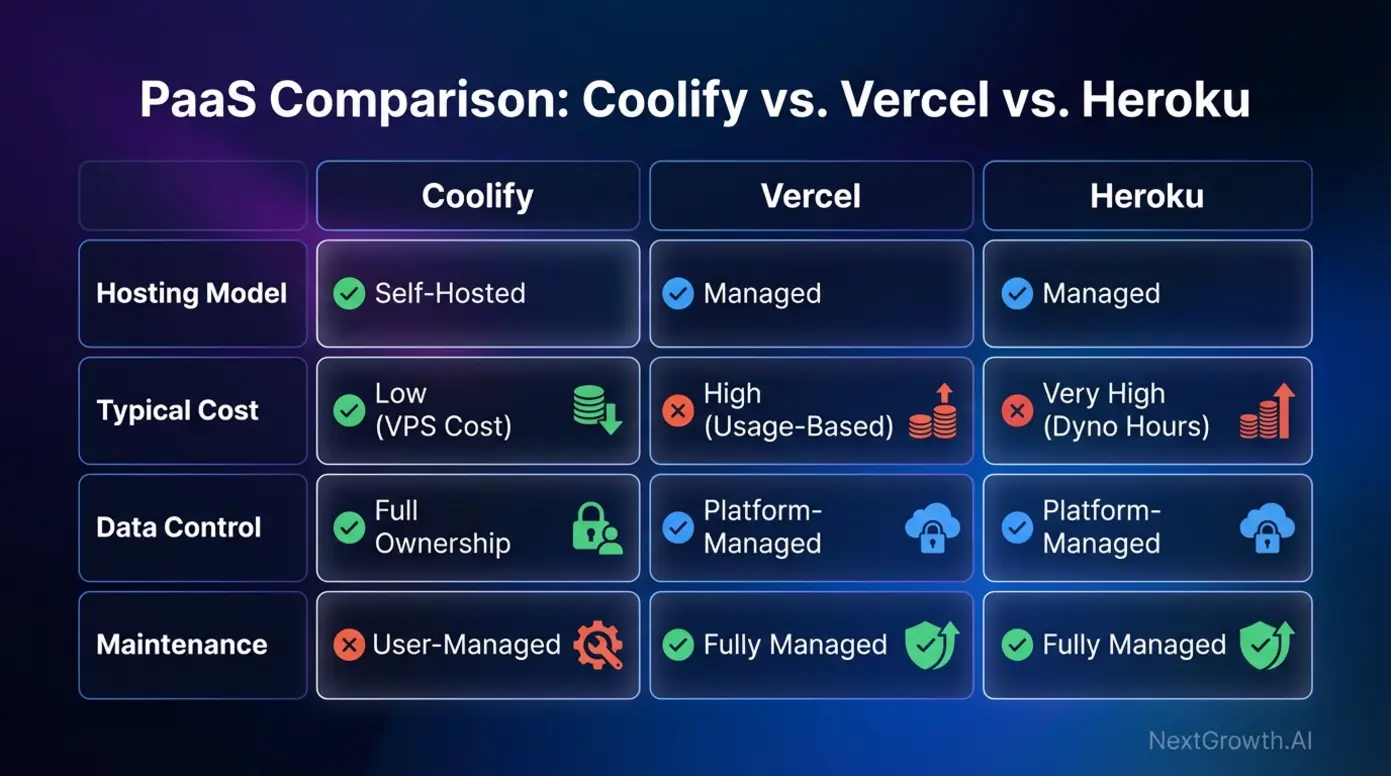
- Built-in Automations: The platform handles many of the tedious DevOps tasks automatically. This includes SSL certificates, reverse proxy setup, domain routing, and health checks — all automated. As a member of the RedwoodJS community noted, “Coolify is like your own Netlify or Vercel. It handles a lot of (not all) DevOps for you.” As shown in the ‘Coolify vs. Vercel/Heroku Comparison’ below, the platform offers distinct advantages.
How Do You Secure and Manage a Coolify Server in Production?
Production Coolify servers need UFW firewall rules, SSH key hardening, and regular updates to the Coolify binary itself. We learned this the hard way when our default install left ports exposed. The hardening process takes about 30 minutes and dramatically reduces your attack surface.
Production Coolify servers need UFW firewall rules, SSH key hardening, and regular updates to the Coolify binary itself. We learned this the hard way when our default install left ports exposed. The hardening process takes about 30 minutes and dramatically reduces your attack surface.
Container security remains the top concern for self-hosted infrastructure — 76% of organizations report running containers with known vulnerabilities (Sysdig Cloud Native Security Report, 2024). While Coolify simplifies deployment, the “self-hosting” aspect means you’re responsible for the security and maintenance of the host machine. After eight months running Coolify in production, here’s my Day 2 checklist for keeping things locked down.
Prerequisites: Where Can You Install Coolify?
Before you can begin, you need a server that meets the minimum system requirements. The question of where is Coolify installed is flexible, but the hardware needs are specific. Officially, Coolify requires a server running a clean installation of Ubuntu 22.04 (or newer), with at least 2 CPUs and 2GB of RAM. More resources are recommended depending on the number and size of the applications you plan to run.
You can install Coolify on nearly any standard Linux environment. This includes a Virtual Private Server (VPS) from a cloud provider, a dedicated physical server, or even a local machine like a Raspberry Pi for development and testing purposes.
The installation itself is typically done via a single command-line script. Always get this command directly from the official Coolify GitHub repository — using an outdated command from a third-party tutorial can lead to a failed or insecure installation.
As of early 2026, the official install command looks like this:
curl -fsSL https://cdn.coollabs.io/coolify/install.sh | bashThis single command installs Docker, configures the background service, and sets up the web dashboard on port 8000. The entire process takes about 2-3 minutes on a fresh Ubuntu server. After installation, you’ll access the dashboard at http://your-server-ip:8000 to complete the initial setup.
Once the base system is running, the next critical step is securing it for production traffic.
Production Hardening: Beyond the Default Firewall Setup
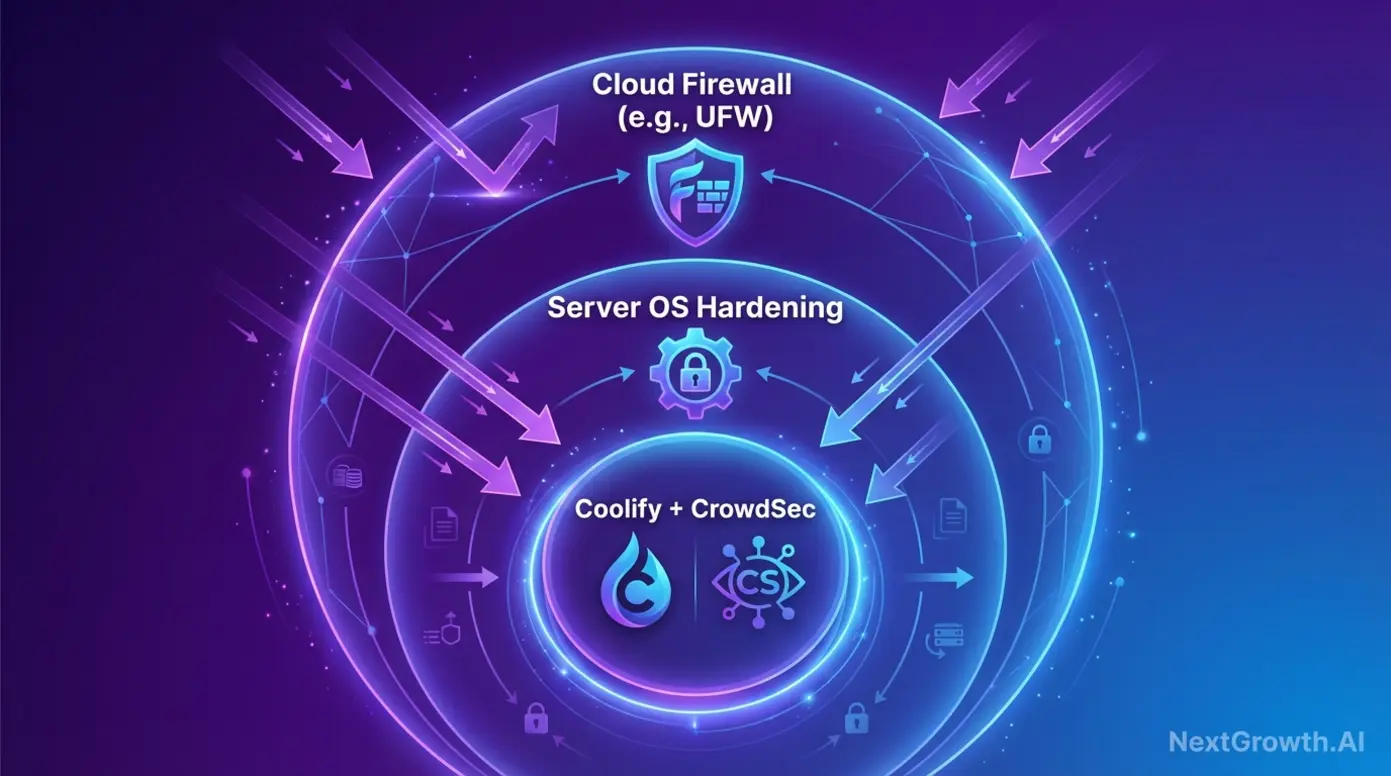
A default Coolify installation is functional, but it is not fully hardened for production. From my experience, a freshly installed Coolify instance needs three immediate security steps. While the platform can manage a software firewall like UFW, community best practices suggest a multi-layered approach for better protection.
First, always use your cloud provider’s firewall as the first line of defense. This network-level firewall can block malicious traffic before it even reaches your server. An independent security guide advises this approach because of how Docker can directly manipulate iptables, potentially bypassing local UFW rules. The guide also recommends ensuring that public registration is disabled in the dashboard after your initial setup.
For a more proactive security posture, consider integrating a tool like CrowdSec. A guide from CrowdSec from 2024 explains how to deploy their agent as a Docker container within your server environment. For automated blog publishing on Coolify, see the SEVOsmith v2.2.0 content engine guide. The CrowdSec agent watches logs from your running services, identifies malicious behavior (like brute-force attempts or web scans), and automatically bans the offending IPs using a shared global blocklist. This adds an intelligent layer of automated threat prevention to your self-hosted infrastructure.
Troubleshooting Common Issues: The ‘Unhealthy Container’ Problem
I hit this myself during my first week with Coolify. One of the most common issues new users encounter is seeing the “unhealthy” status next to their deployed application. The message “container is unhealthy” means that the app inside the container failed its health check. The system performs these checks periodically to ensure your application is not only running but also responsive.
Typically, a container gets marked as unhealthy for one of these reasons:
- Application Crash: Your code might have a bug that causes it to crash on startup.
- Incorrect Port Configuration: The application might be listening on a different port than the one you exposed in your deployment settings.
- Slow Startup Time: Some applications take longer to initialize. The health check might fail if it runs before the application is ready to accept connections.
When this happens, here’s the troubleshooting checklist I follow:
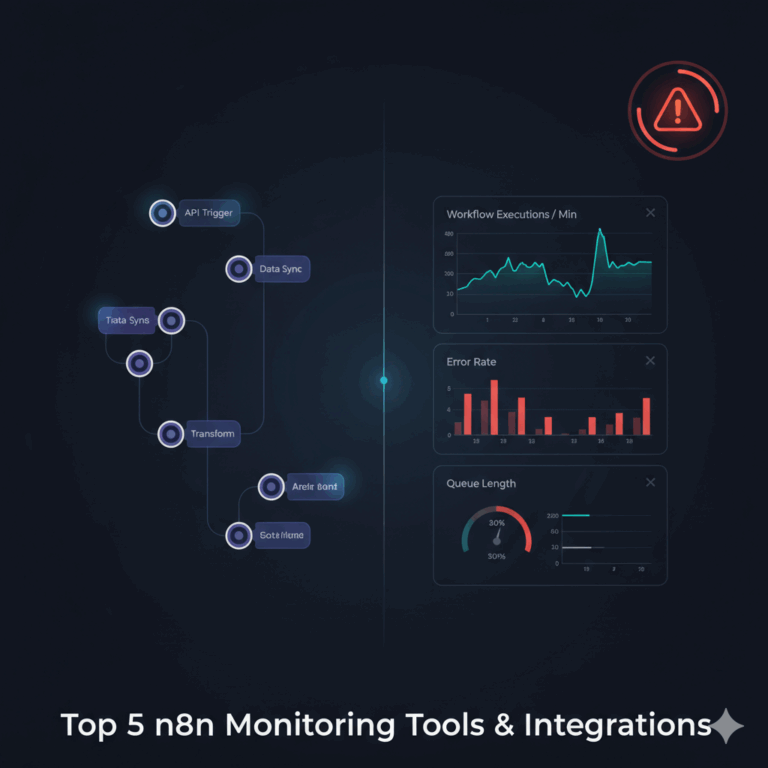
- Check Application Logs: The first step is always to look at the real-time logs in the web dashboard (for deeper monitoring, we pair this with Prometheus and Grafana). They will almost always contain an error message explaining why the application failed to start.
- Verify Exposed Port: Double-check that the “Port” number in your application’s settings matches the port your application is configured to listen on in its code.
- Adjust Health Check: If your application has a slow startup, you can adjust the health check interval in the application’s settings to give it more time before it’s marked as unhealthy. A GitHub issue discussion provides insight into how these checks are configured and can help in debugging more complex scenarios.
Risks and Considerations: When is Coolify NOT the Right Choice?

Coolify is not the right choice if you need enterprise SLAs, managed compliance (SOC 2, HIPAA), or automatic horizontal scaling beyond a few servers. It also requires basic Linux and Docker knowledge. Teams without DevOps experience should consider Coolify Cloud or a managed alternative like Railway.
Coolify is not the right choice if you need enterprise SLAs, managed compliance (SOC 2, HIPAA), or automatic horizontal scaling beyond a few servers. It also requires basic Linux and Docker knowledge. Teams without DevOps experience should consider Coolify Cloud or a managed alternative like Railway.
Self-hosting saves money but costs time. After Heroku eliminated its free tier in November 2022, tools like Coolify saw a surge in adoption — but not every project benefits from managing its own infrastructure. Based on my experience running three production Coolify servers, here’s an honest assessment of when it makes sense and when it doesn’t.
First, consider the hidden cost of maintenance. While the software license is free, your time isn’t. You’re responsible for security patches, OS updates, troubleshooting, and backups. In my experience, expect to spend 2-4 hours per month on maintenance tasks — that’s a real cost to factor into your total cost of ownership. For solo developers or small teams without system administration experience, this responsibility can become a significant distraction from building their core product. If you just need analytics and monitoring tools without managing infrastructure, a managed service may be simpler.
I won’t sugarcoat it — there are real risks with self-hosting. For enterprise apps with strict uptime SLAs, SOC 2 or HIPAA compliance, or 24/7 support needs, self-hosting may introduce unacceptable business risk. In those cases, paying more for Heroku, Vercel, or AWS buys you a dedicated team managing reliability and security. Bottom line: if you value cost savings and control, it’s excellent. If you need to completely offload infrastructure management, look elsewhere.
Frequently Asked Questions
What is the use of Coolify?
It is used to simplify the process of self-hosting applications, databases, and other services. It acts as an open-source Platform-as-a-Service (PaaS) that allows you to deploy code directly from a Git repository to a server you control. It automates complex tasks like SSL certificate management, reverse proxies, and backups, providing a user-friendly dashboard for managing your infrastructure.
Is Coolify free to use?
Yes, the self-hosted version of Coolify is 100% free and open-source. You can install and run the software on your own servers without any licensing fees. However, you are still responsible for paying for the host machine hardware from a VPS provider. The project also offers a paid “Coolify Cloud” service for users who want the team to manage the control panel installation and updates.
How does Coolify compare to Heroku?
It is a self-hosted alternative to Heroku. Both platforms provide a similar “push-to-deploy” developer experience that simplifies application deployment. The key difference is that Heroku is a fully managed service that runs on its own infrastructure for a premium price, while Coolify is software you run on your own servers. This gives you significantly lower costs and more control, but requires you to manage the server yourself.
What databases does Coolify support?
The platform offers one-click setup for a wide range of popular databases. This includes relational databases like PostgreSQL, MySQL, and MariaDB, as well as NoSQL databases like MongoDB and in-memory stores like Redis. It also supports Clickhouse, DragonFly, and KeyDB. For all supported databases, it can also handle automated backups to a destination of your choice.
Is Coolify a VPS?
No, it is not a VPS (Virtual Private Server). It is a software control panel that you install on a VPS or another server. You must first acquire a server from a hosting provider like DigitalOcean, Hetzner, or AWS. Then, you install the platform on that server to manage your applications and services. It is the management layer, while the VPS is the underlying hardware.
We’ve tested both platforms side by side. For a detailed comparison, read our Coolify vs Dokploy analysis, which covers deployment experience, resource usage, and feature parity between the two platforms.
Is Coolify the Right Self-Hosting Platform for Your Project?
After eight months of running Coolify across three Hetzner servers, my hosting costs dropped from roughly $150/month on managed platforms to under $30/month — while gaining full control over my data and deployment pipeline. The platform delivers on its core promise: a self-hosted PaaS that gives you the developer experience of Heroku without the price tag. But it’s not zero-maintenance — you’ll spend a few hours per month on security patches, updates, and occasional troubleshooting.
If you’re a developer or small team spending $50+ per month on Heroku, Vercel, or Railway — and you’re comfortable with basic Linux administration — Coolify is worth trying. The initial setup takes an afternoon, and the ongoing maintenance is manageable once you’ve hardened the server. For teams that need SOC 2 compliance, 24/7 support, or can’t afford any infrastructure management overhead, stick with a managed platform.
To get started, provision a VPS from Hetzner (starting at €3.99/month for a CX22) or DigitalOcean ($6/month). Run the Coolify install script, connect your GitHub repo, and deploy your first application — the whole process takes under 30 minutes.