Self-Hosting n8n Made Easy: The Complete Guide to Install, Upgrade, Backup, Restore and Monitoring
You’ve discovered the power of n8n, but the leap to a stable, secure self-hosted setup is daunting. Many tutorials leave you with a fragile instance that loses all your data on restart or is wide open to security risks.
This guide is different. It is the definitive roadmap for deploying a bulletproof, production-grade n8n instance on Ubuntu using Docker Compose. We’ll take you step-by-step from a fresh server to a fully secured and persistent automation engine.
For a managed deployment option, consider using Coolify as your self-hosted PaaS.
You will get a complete, copy-and-paste configuration blueprint, learn how to secure your instance with automatic SSL, manage data correctly to prevent data loss, and build a system you can rely on for business-critical workflows like keyword research automation. This is the blueprint for doing it right, once.
This guide cuts through the noise, and it will walk you through:
- ✅ Installing n8n on an Ubuntu server with Docker Compose, Traefik, and PostgreSQL
- ✅ Safely upgrading n8n to a pinned or latest version
- ✅ Backing up and restoring your entire stack to prevent data loss
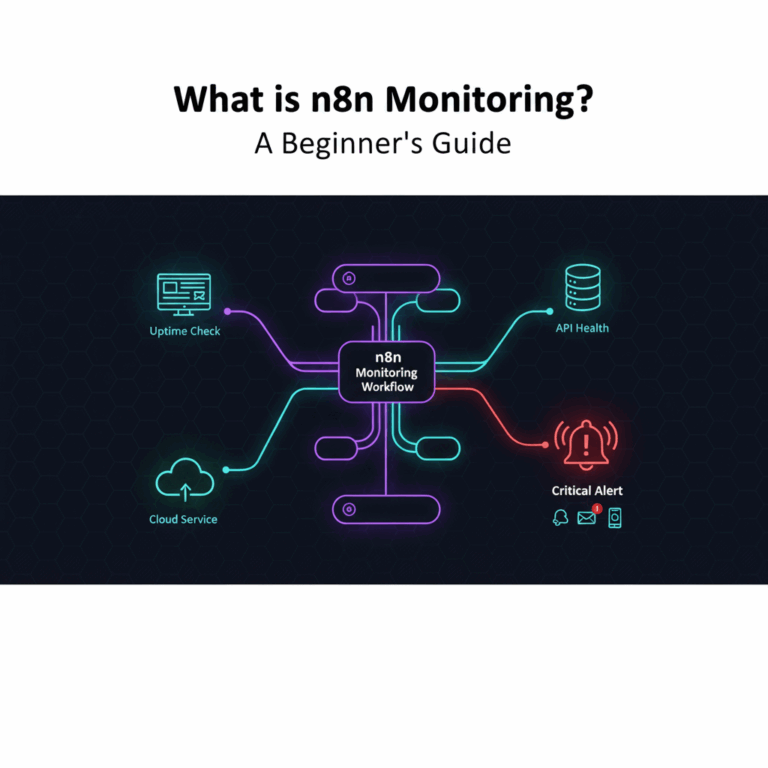
- ✅ Adding monitoring with Prometheus & Grafana for dashboards and alerts
By the end, you’ll fully understand the lifecycle of a production-ready n8n instance—and you’ll be able to install, upgrade, back up, and restore your own deployment without depending on any other platform.
Prefer automation?
Prefer not to hand-configure? n8n Manager gives you a turnkey, production-ready setup in minutes. One script covers install, repeatable envs, upgrades, and full disaster recovery (backup & restore). Enable monitoring to auto-provision Prometheus + Grafana and get real-time dashboards and alerts on your n8n’s health and performance.
Contents
- What Are the Core Principles of a Production n8n Setup?
- Prerequisites
- What You Need to Run n8n (and Why)
- How Do You Automate n8n Management with Shell Scripts?
- Step-by-Step Manual Install n8n Single Mode on Ubuntu with Docker
- How to Upgrade n8n instance
- How to Backup your n8n instance
- How to Restore the n8n instance
- Frequently Asked Questions
- What’s the best way to install n8n on Ubuntu for production?
- What are the minimum server requirements for self-hosting n8n?
- How do I secure my n8n instance on Ubuntu with HTTPS?
- Do I need a separate database for n8n on Ubuntu?
- Can I use a different database like MySQL instead of PostgreSQL?
- What common mistakes should I avoid when self-hosting n8n?
- Why might webhooks fail in a self-hosted setup?
- How do I recover if the server goes down or I lose data?
- Resources
- Conclusion
What Are the Core Principles of a Production n8n Setup?
Before we touch the command line, let’s establish three non-negotiable principles. Ignoring these is the root cause of nearly all self-hosting failures. Our entire setup is built on this foundation.
- Principle 1: Use a Production Database. The default SQLite database is a time bomb for any serious use case. It can’t handle simultaneous workflow executions and is prone to data corruption. We will use PostgreSQL, a battle-tested database that ensures data integrity and scalability from day one.
- Principle 2: Never Expose n8n Directly. Running n8n and exposing its port to the internet is a massive security risk. We will use Traefik as a reverse proxy. It acts as a secure gatekeeper, handling automatic SSL/TLS encryption (the green padlock), managing traffic, and protecting your n8n application.
- Principle 3: Guarantee Data Persistence. By default, Docker containers are ephemeral. If you remove the container, your data is gone. We will use named volumes to ensure all your workflows, credentials, and database information are stored safely and persist through updates and restarts.
Prerequisites
To follow this guide, you will need:
- A fresh Ubuntu Server (22.04 or newer is recommended). A cloud provider like DigitalOcean, Vultr, or Hetzner is a great choice.
- A registered domain name (e.g., n8n.yourcompany.com) with the DNS A record pointed to your server’s public IP address.
- Basic familiarity with the command line.
- An SSH client to connect to your server.
What You Need to Run n8n (and Why)
The Production Stack (at a glance):
- Docker + Docker Compose (on Ubuntu): Orchestrates n8n, PostgreSQL, and Traefik into one repeatable, production-ready setup.
- PostgreSQL: Stores workflows, credentials, executions, and logs reliably.
- Traefik (reverse proxy): Handles HTTPS termination, domain routing, and Let’s Encrypt certificates automatically.
- n8n application: The automation engine you’ll access from your browser.
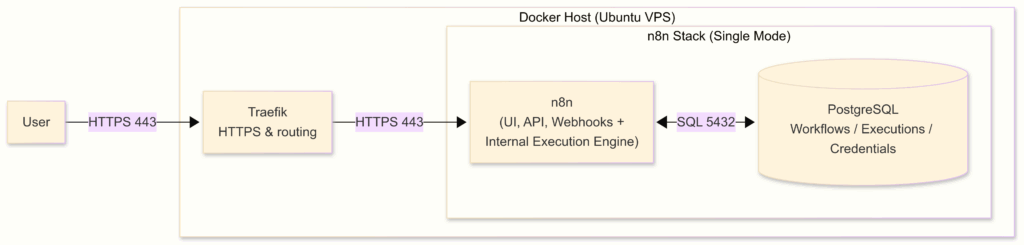
n8n Single Mode Observability Architecture:

Why Docker Compose on Ubuntu?
The best practice for production is to run n8n using Docker Compose, because it:
- Starts/stops the entire stack with one command.
- Runs each service in its own container for safety and easier debugging.
- Simplifies upgrades and rollbacks.
- Provides resilience with restart policies and persistent volumes.
- Centralizes environment variables, storage, and scaling in one file.
Why PostgreSQL (not SQLite)?
Use PostgreSQL in production instead of SQLite because it:
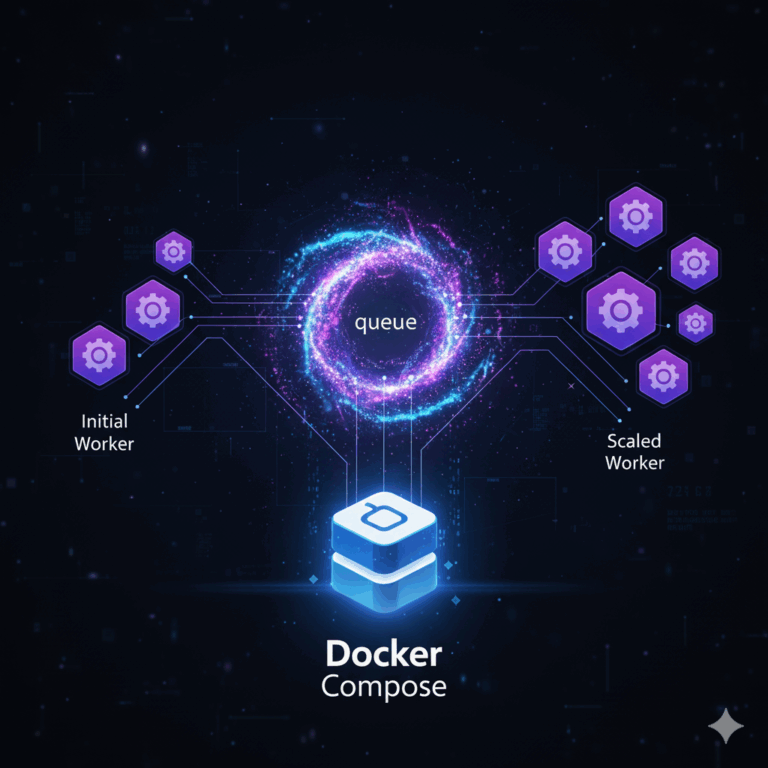
- Handles multiple workers and higher throughput.
- Supports queue mode and scaling.
- Enables safer backups and migrations.
- Maintains stronger data integrity under load.
If you are considering a self-hosted PaaS for deploying n8n and other services, our Coolify vs Dokploy comparison covers which platform works best for different use cases, including n8n deployment.
Why Traefik (not Nginx or Caddy)?
For HTTPS and routing, Traefik is the best choice for Dockerized n8n because it:
- Auto-discovers containers with Docker labels.
- Manages Let’s Encrypt SSL certificates automatically.
- Supports sticky sessions and load balancing.
- Integrates smoothly with Docker Compose.
How Do You Automate n8n Management with Shell Scripts?
Managing n8n by hand—installing, upgrading, backing up, restoring—takes time and invites mistakes. That’s why I built n8n_manager.sh, a script that automates the entire lifecycle of a self-hosted n8n instance in just a few commands.
What it covers:
- Install — Deploy n8n with Docker Compose, PostgreSQL, and Traefik (HTTPS via Let’s Encrypt).
- Upgrade — Safely pull a pinned or latest n8n image and redeploy with validation and logs.
- Backup — Archive DB dumps, named volumes, SSL certs, and config files (checksums included).
- Restore — Recover from a local file or
rcloneremote in minutes. - Monitoring — One-flag setup for Prometheus + Grafana with pre-provisioned dashboards and alert rules.
Quick Start
Download the script:
# You can set up this project in two ways, depending on your experience:

# Option 1 — Developers (Git)
git clone https://github.com/thenguyenvn90/n8n-toolkit.git
cd n8n-toolkit

# Option 2 — Download as ZIP
sudo apt update && sudo apt install -y unzip
curl -L -o n8n-toolkit.zip https://github.com/thenguyenvn90/n8n-toolkit/archive/refs/heads/main.zip
unzip n8n-toolkit.zip

#After unzipping, GitHub appends -main to the folder name.
cd n8n-toolkit-mainThe n8n_manager.sh script is the main tool to install, upgrade, backup, restore, cleanup and monitor your n8n stack. Check detail here n8n Manager – User Guide
Usage: ./n8n_manager.sh [ONE ACTION] [OPTIONS]

Actions (choose exactly one):
  -a, --available
        List available n8n versions

  -i, --install <DOMAIN>
        Install n8n with the given base domain (e.g., example.com)
        Optional: --mode single|queue  (default: single)
        Optional: -v|--version <tag>

  -u, --upgrade
        Upgrade n8n to target version (or latest). Domain/FQDNs are read from .env.

  -b, --backup
        Run backup (skip if no changes unless -f)

  -r, --restore <FILE_OR_REMOTE>
        Restore from local file or rclone remote (e.g. gdrive:folder/file.tar.gz)

  -c, --cleanup [safe|all]  Stop stack & remove resources (preview; confirm in 'all')

Options:
  --mode <single|queue>     (install only; default: single)
  -v, --version <tag>       Target n8n version (default: latest stable)
  -m, --ssl-email <email>   LE certificate email (install/upgrade)
  -d, --dir <path>          Target n8n directory (default: /home/n8n)
  -l, --log-level <LEVEL>   DEBUG | INFO (default) | WARN | ERROR
  -f, --force               Upgrade: allow downgrade or redeploy; Backup: force even if unchanged
  -e, --email-to <email>    Send notifications to this address (requires SMTP_USER/SMTP_PASS env)
  -n, --notify-on-success   Also email on success (not just failures)
  -s, --remote-name <name>  rclone remote root (e.g. gdrive-user or gdrive-user:/n8n-backups)
  -h, --help                Show this help

# Monitoring-related (install-time):
  --monitoring                        Enable Prometheus/Grafana profile
  --expose-prometheus                 Expose Prometheus publicly (default: private)
  --subdomain-n8n <sub>               Override n8n subdomain (default: n8n)
  --subdomain-grafana <sub>           Override Grafana subdomain (default: grafana)
  --subdomain-prometheus <sub>        Override Prometheus subdomain (default: prometheus)
  --basic-auth-user <user>            Traefik basic auth user for Grafana/Prometheus
  --basic-auth-pass <pass>            Traefik basic auth pass for Grafana/Prometheus

Examples:
  ./n8n_manager.sh -a
      # List available versions

  ./n8n_manager.sh --install example.com -m you@example.com
      # Install the latest n8n version with single mode

  ./n8n_manager.sh --install example.com -m you@example.com -v 1.105.3 --mode queue
      # Install a specific n8n version with queue mode

  ./n8n_manager.sh --install example.com -m you@example.com -d /path/to/n8n --mode queue
      # Install the latest n8n version (queue mode) to a specific target directory

  ./n8n_manager.sh --install example.com -m you@example.com --mode queue --monitoring --basic-auth-user admin --basic-auth-pass 'StrongPass123'
      # Install the latest n8n version (queue mode) with monitoring (Grafana + Prometheus)

  ./n8n_manager.sh --upgrade
      # Upgrade to the latest n8n version (domain/FQDNs read from .env)

  ./n8n_manager.sh --upgrade -f -v 1.107.2
      # Upgrade to a specific n8n version

  ./n8n_manager.sh --backup --remote-name gdrive-user --email-to ops@example.com --notify-on-success
      # Backup and upload to Google Drive, notify via email

  ./n8n_manager.sh --restore backups/your_backup_file.tar.gz
      # Restore with the tar.gz file at local
Example: install n8n (single mode) in Ubuntu VPS with docker compose
If you want to enable the monitoring option, follow my detailed guide here: install n8n single mode with monitoring
Step-by-Step Manual Install n8n Single Mode on Ubuntu with Docker
In this section, we’ll manually set up a production-ready n8n stack on Ubuntu using Docker Compose. The stack will include:
- n8n – the automation platform
- PostgreSQL – database for storing workflows and credentials
- Traefik – reverse proxy for HTTPS and domain routing
- Let’s Encrypt – automatic SSL certificate management
Step 1: Prepare VPS and Update DNS record
Use this as a starting point. Size up or down after you observe real traffic, execution duration, and resource headroom.
| Use case | vCPU | RAM | Disk (SSD) | Notes |
|---|---|---|---|---|
| Dev / trial | 1 | 2 GB | 25–40 GB | Fine for tests and a few light workflows. Expect slowdowns under load. |
| Small production | 2 | 4 GB | 40–60 GB | Dozens of workflows, low concurrency, webhooks OK. Solid default for new installs. |
| Growing production | 4 | 8 GB | 80–100 GB | Many workflows, frequent webhooks, large binaries. At this stage, consider Queue Mode for throughput & isolation. |
To make your n8n instance accessible online, create a dedicated subdomain that points to your server’s IP address.
Add the following DNS record in your domain provider’s DNS settings:
| Record Type | Name (Subdomain) | Value (Destination) |
|---|---|---|
| A | n8n (or your chosen subdomain) | <your_server_IP_address> |
Wait a few minutes for DNS propagation, then verify that your domain resolves to your VPS IP.
DOMAIN="n8n.yourdomain.com"; SERVER_IP="$(curl -s https://api.ipify.org)"; \
DNS_IPS="$( (command -v dig >/dev/null && dig +short A "$DOMAIN") || getent ahostsv4 "$DOMAIN" | awk '{print $1}' )"; \
echo "Server IP: $SERVER_IP"; echo "DNS A records for $DOMAIN:"; echo "$DNS_IPS"; \
echo "$DNS_IPS" | grep -Fxq "$SERVER_IP" && echo "✅ PASS: $DOMAIN points to this server" || echo "❌ FAIL: $DOMAIN does not point to this server"Step 2: Install Docker and Docker Compose
Docker lets us run n8n, PostgreSQL, and Traefik in isolated containers. Docker Compose ties them together into a single stack.
# Step 1: Install required dependencies
sudo apt-get update
sudo apt-get install -y ca-certificates curl gnupg lsb-release

# Step 2: Add Docker’s official GPG key
sudo mkdir -p /etc/apt/keyrings
curl -fsSL https://download.docker.com/linux/ubuntu/gpg | \
  sudo gpg --dearmor -o /etc/apt/keyrings/docker.gpg

# Step 3: Add the Docker repository
echo \
  "deb [arch=$(dpkg --print-architecture) signed-by=/etc/apt/keyrings/docker.gpg] \
  https://download.docker.com/linux/ubuntu $(lsb_release -cs) stable" | \
  sudo tee /etc/apt/sources.list.d/docker.list > /dev/null

# Step 4: Install Docker Engine and Compose v2
sudo apt-get update
sudo apt-get install -y docker-ce docker-ce-cli containerd.io docker-compose-plugin

# Step 5: Allow user to run Docker without sudo
sudo usermod -aG docker ${USER}
# Register the `docker` group membership with current session without changing your primary group
exec sg docker newgrpStep 3: Create docker-compose.yml and .env file
Prepare the project directory
It’s best to install n8n in a dedicated folder on your VPS. This keeps everything in one place, so upgrade, backups, restore are easy to manage later.
mkdir -p /home/n8nCreate docker-compose.yml
You can copy the docker-compose.yml here or from my GitHub: single-mode/docker-compose.yml
Example docker-compose.yml
services:
  traefik:
    image: traefik:v2.11
    restart: unless-stopped
    command:
      - "--api.dashboard=false"
      # EntryPoints
      - "--entrypoints.web.address=:80"
      - "--entrypoints.web.http.redirections.entrypoint.to=websecure"
      - "--entrypoints.web.http.redirections.entrypoint.scheme=https"
      - "--entrypoints.websecure.address=:443"
      # Providers
      - "--providers.docker=true"
      - "--providers.docker.exposedbydefault=false"
      - "--providers.docker.network=n8n-network"
      # ACME (production)
      - "--certificatesresolvers.le.acme.email=${SSL_EMAIL}"
      - "--certificatesresolvers.le.acme.storage=/letsencrypt/acme.json"
      - "--certificatesresolvers.le.acme.tlschallenge=true"
      # Logs
      - "--log.level=INFO"
      - "--accesslog=true"
      # Health check
      - "--ping=true"
      - "--ping.entrypoint=traefikping"
      - "--entrypoints.traefikping.address=:8082"
      # Prometheus metrics
      - "--metrics.prometheus=true"
      - "--metrics.prometheus.addEntryPointsLabels=true"
      - "--metrics.prometheus.addRoutersLabels=true"
      - "--metrics.prometheus.addServicesLabels=true"
      - "--entrypoints.metrics.address=:8081"
      - "--metrics.prometheus.entryPoint=metrics"
    ports:
      - "80:80"
      - "443:443"
    volumes:
      - /var/run/docker.sock:/var/run/docker.sock:ro
      - letsencrypt:/letsencrypt
      - ./secrets/htpasswd:/etc/traefik/htpasswd:ro
    networks: [n8n-network]
    security_opt: [no-new-privileges:true]
    healthcheck:
      test: ["CMD", "wget", "--spider", "-q", "http://localhost:8082/ping"]
      interval: 10s
      timeout: 5s
      start_period: 20s
      retries: 5

  postgres:
    image: postgres:14
    restart: unless-stopped
    env_file: [.env]
    environment:
      - TZ=${GENERIC_TIMEZONE}
    volumes:
      - postgres-data:/var/lib/postgresql/data
    networks: [n8n-network]
    security_opt: [no-new-privileges:true]
    healthcheck:
      test: ["CMD", "pg_isready", "-U", "${POSTGRES_USER}"]
      interval: 10s
      timeout: 5s
      start_period: 20s
      retries: 5

  # n8n (single mode)
  main:
    image: docker.n8n.io/n8nio/n8n:${N8N_IMAGE_TAG:-latest}
    restart: unless-stopped
    env_file: [.env]
    environment:
      - TZ=${GENERIC_TIMEZONE}
      - N8N_METRICS=true
    volumes:
      - n8n-data:/home/node/.n8n
      - ./local-files:/files
    depends_on:
      postgres:
        condition: service_healthy
    networks: [n8n-network]
    security_opt: [no-new-privileges:true]
    healthcheck:
      test: ["CMD-SHELL", "wget --spider -q http://localhost:${N8N_PORT:-5678}/healthz || exit 1"]
      interval: 10s
      timeout: 5s
      start_period: 20s
      retries: 5
    labels:
      - "traefik.enable=true"
      - "traefik.docker.network=n8n-network"
      # Router & TLS
      - "traefik.http.routers.n8n.rule=Host(`${N8N_FQDN}`)"
      - "traefik.http.routers.n8n.entrypoints=websecure"
      - "traefik.http.routers.n8n.tls=true"
      - "traefik.http.routers.n8n.tls.certresolver=le"
      # Bind the router to the named Traefik service defined below
      - "traefik.http.routers.n8n.service=n8n"
      - "traefik.http.services.n8n.loadbalancer.server.port=${N8N_PORT:-5678}"
      # Middlewares
      - "traefik.http.routers.n8n.middlewares=n8n-headers,n8n-rate,n8n-retry,n8n-compress"
      # Security headers
      - "traefik.http.middlewares.n8n-headers.headers.stsSeconds=315360000"
      - "traefik.http.middlewares.n8n-headers.headers.browserXssFilter=true"
      - "traefik.http.middlewares.n8n-headers.headers.contentTypeNosniff=true"
      - "traefik.http.middlewares.n8n-headers.headers.forceSTSHeader=true"
      - "traefik.http.middlewares.n8n-headers.headers.stsIncludeSubdomains=true"
      - "traefik.http.middlewares.n8n-headers.headers.stsPreload=true"
      # Rate limiting
      - "traefik.http.middlewares.n8n-rate.ratelimit.average=100"
      - "traefik.http.middlewares.n8n-rate.ratelimit.burst=50"
      - "traefik.http.middlewares.n8n-rate.ratelimit.period=1s"
      # Retry & compression
      - "traefik.http.middlewares.n8n-retry.retry.attempts=3"
      - "traefik.http.middlewares.n8n-compress.compress=true"

  # ===== Monitoring (enabled by COMPOSE_PROFILES=monitoring) =====
  prometheus:
    profiles: ["monitoring"]
    image: prom/prometheus:latest
    restart: unless-stopped
    command:
      - "--config.file=/etc/prometheus/prometheus.yml"
      - "--storage.tsdb.retention.time=15d"
    volumes:
      - ./monitoring/prometheus.yml:/etc/prometheus/prometheus.yml:ro
      - prometheus-data:/prometheus
    networks: [n8n-network]
    security_opt: [no-new-privileges:true]
    labels:
      - "traefik.enable=${EXPOSE_PROMETHEUS:-false}"
      - "traefik.docker.network=n8n-network"
      - "traefik.http.routers.prom.rule=Host(`${PROMETHEUS_FQDN}`)"
      - "traefik.http.routers.prom.entrypoints=websecure"
      - "traefik.http.routers.prom.tls=true"
      - "traefik.http.routers.prom.tls.certresolver=le"
      - "traefik.http.services.prom.loadbalancer.server.port=9090"
      - "traefik.http.routers.prom.middlewares=prom-auth@docker"
      - "traefik.http.middlewares.prom-auth.basicauth.usersfile=${TRAEFIK_USERSFILE}"

  grafana:
    profiles: ["monitoring"]
    image: grafana/grafana:latest
    restart: unless-stopped
    environment:
      - TZ=${GENERIC_TIMEZONE}
      - GF_SECURITY_ADMIN_USER=admin
      - GF_SECURITY_ADMIN_PASSWORD=${MONITORING_BASIC_AUTH_PASS}
      - GF_SERVER_DOMAIN=${GRAFANA_FQDN}
      - GF_SERVER_ROOT_URL=https://${GRAFANA_FQDN}
      - GF_SERVER_ENFORCE_DOMAIN=true
      - GF_SECURITY_COOKIE_SECURE=true
      - GF_USERS_ALLOW_SIGN_UP=false
      - GF_PATHS_PROVISIONING=/etc/grafana/provisioning
    volumes:
      - grafana-data:/var/lib/grafana
      - ./monitoring/grafana/provisioning/datasources:/etc/grafana/provisioning/datasources:ro
      - ./monitoring/grafana/provisioning/dashboards:/etc/grafana/provisioning/dashboards:ro
      - ./monitoring/grafana/provisioning/alerts:/etc/grafana/provisioning/alerts:ro
    networks: [n8n-network]
    security_opt: [no-new-privileges:true]
    labels:
      - "traefik.enable=true"
      - "traefik.docker.network=n8n-network"
      - "traefik.http.routers.grafana.rule=Host(`${GRAFANA_FQDN}`)"
      - "traefik.http.routers.grafana.entrypoints=websecure"
      - "traefik.http.routers.grafana.tls=true"
      - "traefik.http.routers.grafana.tls.certresolver=le"
      - "traefik.http.services.grafana.loadbalancer.server.port=3000"
      - "traefik.http.routers.grafana.middlewares=grafana-auth@docker,secure-headers@docker"
      - "traefik.http.middlewares.grafana-auth.basicauth.usersfile=${TRAEFIK_USERSFILE}"
      - "traefik.http.middlewares.grafana-auth.basicauth.removeheader=true"
      - "traefik.http.middlewares.secure-headers.headers.stsSeconds=31536000"
      - "traefik.http.middlewares.secure-headers.headers.stsIncludeSubdomains=true"
      - "traefik.http.middlewares.secure-headers.headers.stsPreload=true"
      - "traefik.http.middlewares.secure-headers.headers.browserXssFilter=true"
      - "traefik.http.middlewares.secure-headers.headers.contentTypeNosniff=true"
    depends_on: [prometheus]

  postgres-exporter:
    profiles: ["monitoring"]
    image: quay.io/prometheuscommunity/postgres-exporter:latest
    restart: unless-stopped
    environment:
      - DATA_SOURCE_NAME=postgresql://${POSTGRES_USER}:${POSTGRES_PASSWORD}@postgres:5432/${POSTGRES_DB}?sslmode=disable
    networks: [n8n-network]
    security_opt: [no-new-privileges:true]
    depends_on:
      postgres:
        condition: service_healthy

  cadvisor:
    profiles: ["monitoring"]
    image: gcr.io/cadvisor/cadvisor:latest
    restart: unless-stopped
    privileged: true
    volumes:
      - /:/rootfs:ro
      - /var/run:/var/run:ro
      - /sys:/sys:ro
      - /var/lib/docker/:/var/lib/docker:ro
    networks: [n8n-network]
    security_opt: [no-new-privileges:true]

  node-exporter:
    profiles: ["monitoring"]
    image: prom/node-exporter:latest
    restart: unless-stopped
    pid: "host"
    networks: [n8n-network]
    volumes:
      - /proc:/host/proc:ro
      - /sys:/host/sys:ro
      - /:/rootfs:ro
    command:
      - "--path.procfs=/host/proc"
      - "--path.sysfs=/host/sys"
      - "--path.rootfs=/rootfs"
    security_opt: [no-new-privileges:true]

networks:
  n8n-network:
    name: n8n-network
    driver: bridge

volumes:
  n8n-data:
    external: true
  postgres-data:
    external: true
  letsencrypt:
    external: true
  prometheus-data:
    external: true
  grafana-data:
external: trueCreate the .env configuration file
Copy the .env file here or from my GitHub single-mode/.env and then update the values for your own DOMAIN, SSL_EMAIL, GENERIC_TIMEZONE, N8N_ENCRYPTION_KEY, and some Strong Passwords:
Example .env file
# ================================================
#    ENV VARIABLES FOR SINGLE MODE & MONITORING
# ================================================

# -------- DOMAIN & FQDN --------
DOMAIN=example.com
SUBDOMAIN_N8N=n8n-test
SUBDOMAIN_GRAFANA=grafana
SUBDOMAIN_PROMETHEUS=prometheus
SSL_EMAIL=you@example.com
GENERIC_TIMEZONE=Asia/Ho_Chi_Minh

N8N_FQDN=${SUBDOMAIN_N8N}.${DOMAIN}
GRAFANA_FQDN=${SUBDOMAIN_GRAFANA}.${DOMAIN}
PROMETHEUS_FQDN=${SUBDOMAIN_PROMETHEUS}.${DOMAIN}

# -------- IMAGE & RUNTIME --------
N8N_IMAGE_TAG=latest
NODE_ENV=production
N8N_LOG_LEVEL=info
N8N_DIAGNOSTICS_ENABLED=false
N8N_BLOCK_ENV_ACCESS_IN_NODE=true

# -------- n8n URLS --------
N8N_PORT=5678
N8N_PROTOCOL=https
N8N_HOST=${N8N_FQDN}
WEBHOOK_URL=https://${N8N_FQDN}
N8N_EDITOR_BASE_URL=https://${N8N_FQDN}
N8N_PUBLIC_API_BASE_URL=https://${N8N_FQDN}
N8N_SECURE_COOKIE=true

# -------- SECURITY & SECRETS --------
# Generate with: openssl rand -base64 16
POSTGRES_PASSWORD=CHANGE_ME_BASE64_16_BYTES
# Generate with: openssl rand -base64 32
N8N_ENCRYPTION_KEY=CHANGE_ME_BASE64_32_BYTES
# Generate with: openssl rand -base64 16
N8N_BASIC_AUTH_PASSWORD=CHANGE_ME_BASE64_16_BYTES

N8N_ENFORCE_SETTINGS_FILE_PERMISSIONS=true
N8N_BASIC_AUTH_ACTIVE=true
N8N_BASIC_AUTH_USER=admin
# N8N_BASIC_AUTH_PASSWORD=${N8N_BASIC_AUTH_PASSWORD}

# -------- DATABASE SETTINGS --------
DB_TYPE=postgresdb
DB_POSTGRESDB_HOST=postgres
DB_POSTGRESDB_PORT=5432
DB_POSTGRESDB_DATABASE=n8n
DB_POSTGRESDB_USER=n8n
DB_POSTGRESDB_PASSWORD=${POSTGRES_PASSWORD}

POSTGRES_USER=n8n
# POSTGRES_PASSWORD=${POSTGRES_PASSWORD}
POSTGRES_DB=n8n

# -------- RUNNERS (internal) --------
N8N_RUNNERS_ENABLED=true
N8N_RUNNERS_MODE=internal
N8N_RUNNERS_MAX_CONCURRENCY=5
N8N_RUNNERS_AUTH_TOKEN=${N8N_BASIC_AUTH_PASSWORD}

# -------- EXECUTION BEHAVIOR --------
EXECUTIONS_DATA_PRUNE=true
EXECUTIONS_DATA_MAX_AGE=336
EXECUTIONS_RETRY_MAX=3

# -------- MONITORING STACK --------
COMPOSE_PROJECT_NAME=n8n
COMPOSE_PROFILES=
TRAEFIK_USERSFILE=/etc/traefik/htpasswd
MONITORING_BASIC_AUTH_USER=admin
# Grafana admin password and Traefik’s Basic Auth
MONITORING_BASIC_AUTH_PASS=n8nToolKit@2ai4$
EXPOSE_PROMETHEUS=false

# -------- END OF CONFIG --------Edit the top of your /home/n8n/.env file:
DOMAIN=yourdomain.com
SUBDOMAIN_N8N=n8n
SSL_EMAIL=you@yourdomain.com
GENERIC_TIMEZONE=Asia/Ho_Chi_Minh # or your TZ- Generate strong secrets and write them into /home/n8n/.env file:
PG=$(openssl rand -base64 16)
REDIS=$(openssl rand -base64 16)
KEY=$(openssl rand -base64 32)
BASIC=$(openssl rand -base64 16)

# Update the placeholders in .env
sed -i \
 -e "s|^POSTGRES_PASSWORD=.*|POSTGRES_PASSWORD=$PG|" \
 -e "s|^REDIS_PASSWORD=.*|REDIS_PASSWORD=$REDIS|" \
 -e "s|^N8N_ENCRYPTION_KEY=.*|N8N_ENCRYPTION_KEY=$KEY|" \
 -e "s|^N8N_BASIC_AUTH_PASSWORD=.*|N8N_BASIC_AUTH_PASSWORD=$BASIC|" \
.envStep 4: Launch the n8n stack
# Make sure you are in the target directory
cd /home/n8n

# Create a directory called local-files for sharing files between the n8n instance and the host system
mkdir -p ./local-files
# Let your host user own the folder; n8n runs as user 1000 in the container
chown -R ${SUDO_USER:-$USER}:${SUDO_USER:-$USER} ./local-files
chmod 755 ./local-files

# Validate YAML & env expansion first
docker compose config

# Pull images (optional but recommended)
docker compose pull

# Manual create volume
for v in n8n-data postgres-data letsencrypt; do docker volume create "$v"; done
docker volume ls | grep -E 'n8n-data|postgres-data|letsencrypt'

# Start everything (Traefik, Postgres, n8n)
docker compose -f docker-compose.yml up -d

# Check health
docker ps --format "table {{.Names}}\t{{.Status}}"

# Example logs:
# NAMES      STATUS
# n8n        Up 19 seconds (healthy)
# postgres   Up 26 seconds (healthy)
# traefik Up 26 seconds (healthy)The Docker Compose file runs three main containers:
- n8n – the automation app itself.
- Traefik – the reverse proxy that terminates TLS/SSL certificates and routes HTTPS traffic to n8n.
- PostgreSQL – the database container for storing workflows, credentials, and execution history.
It also creates and mounts persistent storage volumes:
| Name | Type | Container Mount | Purpose |
| n8n-data | Volume | /home/node/.n8n | Stores encryption keys, user sessions, and small metadata. |
| postgres-data | Volume | /var/lib/postgresql/data | Stores the PostgreSQL database files (all workflows, credentials, etc.). |
| letsencrypt | Volume | /letsencrypt | Stores TLS/SSL certificates managed by Traefik. |
| ./local-files | Bind | /files | A shared folder between host and n8n. Useful for importing/exporting files inside workflows. |
We use external volumes (named Docker volumes) instead of internal container storage so that:
- Data survives container recreation (upgrades, restarts, rebuilds).
- You can backup and restore volumes independently of the running containers.
- Multiple script runs won’t accidentally wipe your database or certificates.
What about ./local-files (bind mount)?
This maps a folder from the host server filesystem into the container to let workflows read/write files at /files inside n8n, while actually persisting them on the host at ./local-files.
- Example: upload/download files via workflows, process CSV/JSON, or generate reports into
/files.
- Since it maps to a host folder (
./local-files), you can open those files directly on your VPS.
Step 5: Verify the installation
- Visit: https://n8n.yourdomain.com
- Confirm SSL is active (green padlock in the browser).
🎉 Congratulations—you now have a production-ready n8n instance running on Ubuntu with Docker!
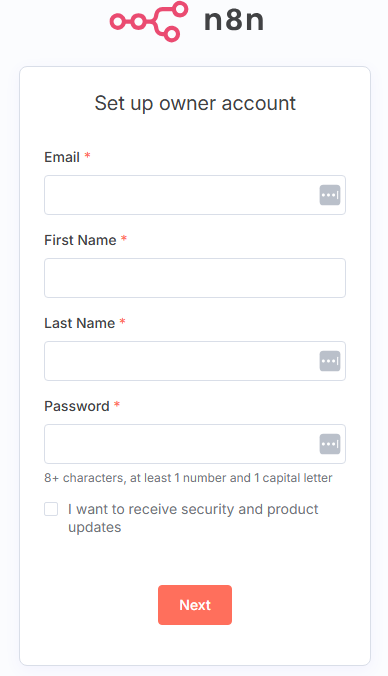
Step 6: First-Time Setup & License Activation
Now, open your browser and visit your n8n instance at the domain or hostname you configured (e.g https://n8n.nextgrowth.ai). You’ll be greeted with the n8n owner account setup page, where you can create your admin account with secure credentials.
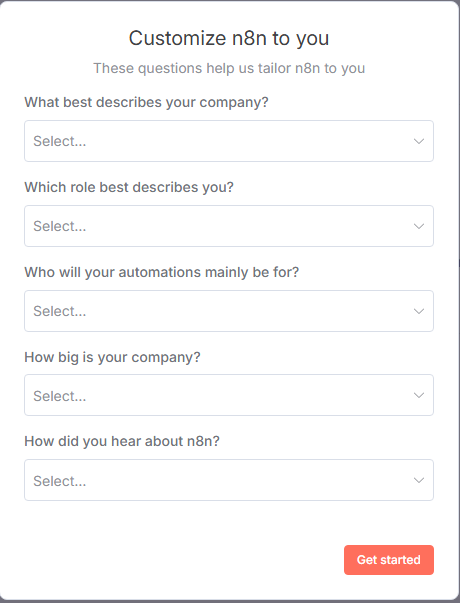
After creating your owner account, n8n will show a short onboarding form to help tailor the experience. This step is optional and only helps n8n understand its users better. Once you’ve filled it out, click Get started.
Next, you’ll see a page offering a free license key for some advanced features:
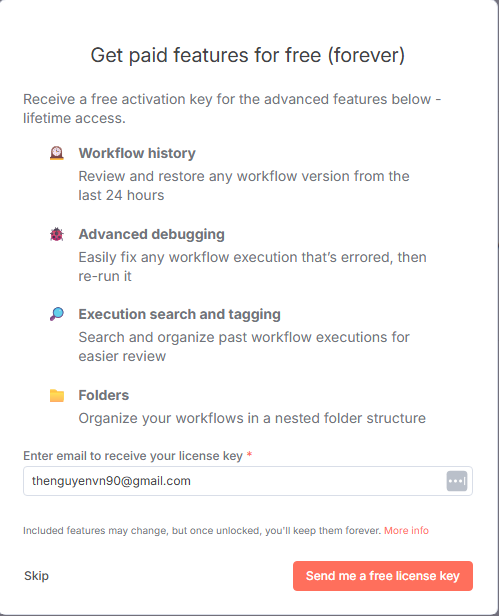
To activate, simply enter your email and click Send me a free license key. You’ll receive a key by email that unlocks these features permanently.
After submitting your email, you’ll receive an email from n8n containing your license key.
To activate:
- Copy the license key from the email.
- In your n8n dashboard, go to Settings → Usage → Plan.
- Paste the key into the activation field.
Your advanced features will now be permanently unlocked for your instance.
How to Upgrade n8n instance
Like any software, keeping n8n updated is critical for security, bug fixes, and new features. With Docker, upgrading is straightforward if you follow the right steps.
# Navigate to the directory containing your docker compose file
cd /home/n8n

# Check your current n8n version
docker exec n8n n8n --version

# Pull latest version
docker compose pull

# Stopping and removing existing containers
docker compose down

# Restart the Stack
docker compose up -d

# Check health
docker ps --format "table {{.Names}}\t{{.Status}}"
# Example logs:
# NAMES      STATUS
# n8n        Up 21 seconds (healthy)
# postgres   Up 28 seconds (healthy)
# traefik    Up 28 seconds (healthy)

# Check your current n8n version to see new version
docker exec n8n n8n --versionHow to Backup your n8n instance
Your automation infrastructure is only as reliable as your maintenance plan. A production setup requires a solid strategy for backups and a safe process for updates.
A Simple Backup Strategy:
With our volume-based setup, backing up is straightforward. You simply need to archive the contents of the Docker volumes. This n8n docker backup strategy can be run periodically via a cron job.
Execute these commands from your host machine to create a compressed backup of your n8n and PostgreSQL data:
# Navigate to the directory containing your docker compose file
cd /home/n8n

# Check containers are healthy before backup
docker ps --format "table {{.Names}}\t{{.Status}}"

# Make suare all container up and running

# Create backup folder
DATE=$(date +%F_%H-%M-%S)
BACKUP_DIR=/home/n8n/backups/backup_$DATE
mkdir -p "$BACKUP_DIR"

# Backup volumes
for vol in n8n-data postgres-data letsencrypt; do
  docker run --rm \
    -v ${vol}:/data \
    -v "$BACKUP_DIR:/backup" \
    alpine sh -c "tar czf /backup/volume_${vol}_$DATE.tar.gz -C /data ."
done

# Backup bind mount volume
tar -czf local-files_backup_$DATE.tar.gz -C /home/n8n local-files

# Dump PostgreSQL database
docker exec postgres pg_dump -U n8n -d n8n > "$BACKUP_DIR/n8n_postgres_dump_$DATE.sql"

# Backup config files
cp /home/n8n/.env "$BACKUP_DIR/.env.bak"
cp /home/n8n/docker-compose.yml "$BACKUP_DIR/docker-compose.yml.bak"

# Compress everything into one archive
tar -czf "/home/n8n/backups/n8n_backup_$DATE.tar.gz" -C "$BACKUP_DIR" .

# Generate checksum (optional)
sha256sum "/home/n8n/backups/n8n_backup_$DATE.tar.gz" > "/home/n8n/backups/n8n_backup_$DATE.tar.gz.sha256"

# Check your backup folder to see the tarball files
ls /home/n8n/backups

# Get the full path of backup tarball
ls /home/n8n/backups/n8n_backup_$DATE.tar.gzHow to Restore the n8n instance
In case of system failure or migration, you can restore your n8n stack from backups.
# Navigate to the directory containing your docker compose file
cd /home/n8n

# Extract the archive
RESTORE_DIR=/home/n8n/restore_$(date +%s)
mkdir -p "$RESTORE_DIR"
tar -xzf /home/n8n/backups/n8n_backup_<timestamp>.tar.gz -C "$RESTORE_DIR"

ll "$RESTORE_DIR"
# Now inside $RESTORE_DIR you’ll have:
  # local-files_backup_*.tar.gz
  # volume_n8n-data_*.tar.gz
  # volume_postgres-data_*.tar.gz (or just a SQL dump)
  # volume_letsencrypt_*.tar.gz
  # n8n_postgres_dump_*.sql (if backup included it)
  # .env.bak and docker-compose.yml.bak

# Stop the current stack
docker compose down --volumes --remove-orphans

# Restore .env and docker-compose.yml
cp -f "$RESTORE_DIR/.env.bak" /home/n8n/.env
cp -f "$RESTORE_DIR/docker-compose.yml.bak" /home/n8n/docker-compose.yml

# Restore bind mount volume

tar -xzf "$RESTORE_DIR"/local-files_backup_<timestamp>..tar.gz -C /home/n8n

# Restore external docker volumes
# Only restore volumes (n8n-data, letsencrypt)
for vol in n8n-data letsencrypt; do   # omit postgres-data if using SQL dump
  VOL_FILE=$(find "$RESTORE_DIR" -name "volume_${vol}_*.tar.gz" -print -quit)
  if [[ -n "$VOL_FILE" ]]; then
    docker volume rm -f $vol 2>/dev/null || true
    docker volume create $vol
    docker run --rm -v ${vol}:/data -v "$RESTORE_DIR:/backup" alpine \
      sh -c "rm -rf /data/* && tar xzf /backup/$(basename $VOL_FILE) -C /data"
    echo "[OK] Restored $vol"
  fi
done

# Start Postgres first
docker compose up -d postgres

# Check if postgres in healthy status
docker inspect --format='{{.State.Health.Status}}' postgres

# Drop & recreate the database
DB_NAME=n8n
DB_USER=n8n
docker exec -i postgres psql -U $DB_USER -d postgres -v ON_ERROR_STOP=1 -c \
"SELECT pg_terminate_backend(pid) FROM pg_stat_activity WHERE datname='${DB_NAME}' AND pid <> pg_backend_pid();"

docker exec -i postgres psql -U $DB_USER -d postgres -v ON_ERROR_STOP=1 -c "DROP DATABASE IF EXISTS ${DB_NAME};"
docker exec -i postgres psql -U $DB_USER -d postgres -v ON_ERROR_STOP=1 -c "CREATE DATABASE ${DB_NAME} OWNER ${DB_USER};"
docker exec -i postgres psql -U $DB_USER -d $DB_NAME < $RESTORE_DIR/n8n_postgres_dump_*.sql

# Start the full stack
docker compose up -d

# Check health
docker ps --format "table {{.Names}}\t{{.Status}}"
# Example logs:
# NAMES      STATUS
# traefik    Up 37 seconds (healthy)
# n8n        Up 37 seconds (healthy)
# postgres Up About a minute (healthy)⚠️ Best Practices
- Automate backups (cron + script) for daily or weekly snapshots.
- Test restores periodically to verify data integrity.
- Keep multiple versions (30-day rolling window recommended).
- Store copies in secure, redundant locations.
Frequently Asked Questions
What’s the best way to install n8n on Ubuntu for production?
The recommended method is Docker Compose. This isolates n8n and its dependencies (like PostgreSQL) in containers, making upgrades, scaling, and backups much easier. With Docker Compose, you can also define environment variables, persistent storage, and restart policies—ensuring your n8n instance is robust and production-ready.
What are the minimum server requirements for self-hosting n8n?
As a solid starting point for moderate use, we recommend a server with at least 1 vCPU, 2GB of RAM, and 20GB of storage. However, your actual requirements will scale with the complexity and frequency of your workflows. Workflows that process large amounts of data or run very frequently will require more CPU and RAM.
How do I secure my n8n instance on Ubuntu with HTTPS?
Use a reverse proxy (Traefik recommended, though Nginx or Caddy also work). Pair it with Let’s Encrypt for free SSL certificates. This ensures all traffic between users and your automation platform is encrypted. Also:
- Set strong credentials.
- Restrict access to the admin interface.
- Keep your containers updated to patch vulnerabilities.
Do I need a separate database for n8n on Ubuntu?
Yes—PostgreSQL is strongly recommended for production. Unlike SQLite (default), PostgreSQL ensures:
- Better persistence and reliability.
- Support for scaling and queue mode.
- Safer backups and easier migrations.
Can I use a different database like MySQL instead of PostgreSQL?
Yes, n8n supports other databases like MySQL or MariaDB. The process is very similar to the one outlined for PostgreSQL. You would add a MySQL service to your Docker Compose file, create a persistent volume for its data, and then update the DB_ environment variables in the n8n service to point to your new MySQL container, ensuring you set DB_TYPE=mysqldb.
What common mistakes should I avoid when self-hosting n8n?
- Using SQLite in production
- Skipping reliable backup strategies
- Lacking error monitoring
- Over-relying on third-party AIs or automated advice. These errors can lead to data loss, downtime, or costly failures.
Why might webhooks fail in a self-hosted setup?
If n8n doesn’t know its public address (missing WEBHOOK_URL), it can generate incorrect local URLs like localhost:5678 that external services can’t reach. Make sure this variable matches your external domain.
How do I recover if the server goes down or I lose data?
You’ll need to rely on your backup strategy: PostgreSQL dumps, backups of volumes, SSL certs, .env, and Compose files. These let you restore quickly. Without backups, you risk permanent data loss and prolonged downtime.
Resources
- Quickstart: Compose and WordPress
- Volumes | Docker Docs
- Traefik Proxy & Docker – Traefik Labs
- postgres – Official Image | Docker Hub
Extending Your n8n Setup
Once your n8n instance is running, you’ll likely need to connect it to external services. Three common integrations worth bookmarking: WordPress Application Passwords for n8n, Cloudflare R2 integration with n8n, and updating Rank Math via n8n REST API.
Conclusion
You’ve successfully journeyed from a simple local n8n instance to a secure, persistent, and production-ready automation powerhouse. By following this tiered blueprint, you have built a foundation that avoids the most common and costly pitfalls of self-hosting. You now have a system that protects your data, secures your connections, and is ready for serious automation tasks.
Understanding the core principles of data persistence with volumes, robust database management with PostgreSQL, and ironclad security with a reverse proxy is the key difference between a temporary toy project and a reliable business asset. You’ve not only deployed n8n; you’ve mastered the architecture required to run it professionally.
You’ve now mastered the blueprint for a robust self-hosted n8n instance. If you’d rather focus on building workflows than managing infrastructure, explore how our managed solution handles all of this—and more—for you automatically.